Wednesday, September 10, 2025

Recipe - Using a Managed Service Account with Windows 2019

1. On the domain controller make sure you have installed the AD module feature and then

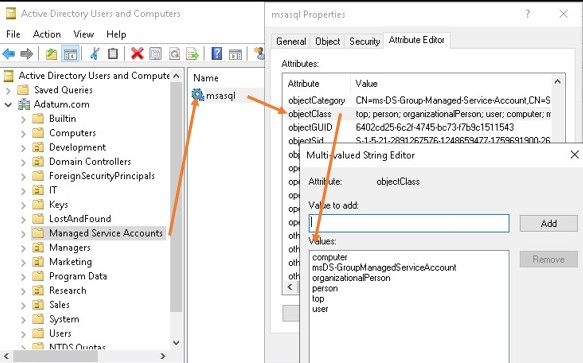
New-ADServiceAccount -Name msasql -DNSHostName msasql.adatum.com

-PrincipalsAllowedToRetrieveManagedPassword "Domain Computers"

-Enabled $True


If you require a SPN you can also use the -ServicePrincipalName parameter.

Replace "Domain Computers" with the computers that are going to run the service using the managed service account. If you are creating a group MSA then this would be the name of the group.

If you get "access denied" or a missing key message, then try this first:

Add-KdsRootKey –EffectiveTime ((get-date).addhours(-10))


2. On the domain controller add the new service account as the service account for the server where it will be used:

Add-ADComputerServiceAccount -Identity lon-exch -ServiceAccount msasql


The -Identity is the server, the -ServiceAccount is the MSA


3. Go to the computer where you will use the managed account. Make sure you have installed the AD Power Shell feature and then

Install-ADServiceAccount -Identity msasql


4. Go to the SQL Configuration and change the appropriate service to use this account.
Make sure you use a dollar sign e.g. adatum\msasql$ and that the password fields are blank.


 If you need to roll the password use:


Reset-ADServiceAccountPassword msasql


References:


Please use Active Directory Group Managed Service Accounts!

This post handles the justification and design for a gMSA. It is also an appeal to Microsoft to increase the number of their services that support gMSAs. (specifically SharePoint. If you are looking for a quick step by step how to use a gMSA, please click here

What is a gMSA?

We have all noticed that Active Directory automatically synchronizes a password between AD and a Computer. The default is 30 days. 
A Managed Service Account that uses the same system for synchronizing the password of a Service Account.

Why use a gMSA?


It rolls the passwords for the service account automatically, thus ensuring that security standards are met.

How does a gMSA work?


 A gmsa is both a user account and a computer account.This enables it to use the same mechanism for rolling passwords as a computer account.Rolling is done according to a 30 day schedule and can be set in the registry, it is not based on the usual domain group policy.
The password is generated by the Key Distribution Service.

What should Microsoft do?

 
At present, for Exchange Server we have to roll the passwords manually. This is because of a depedency on Windows Cluster Services.


SharePoint has its own "Managed Accounts" where it rolls the password.One can schedule how often the password is rolled, there are also options to make sure it is rolled before password policies are enforced and to have an email notification before a password change.
 

References:

https://community.spiceworks.com/topic/151704-how-often-should-i-change-passwords-for-servers-firewalls-etc

https://www.stigviewer.com/stig/windows_2008_member_server/2018-03-07/finding/V-14271  

https://docs.microsoft.com/en-us/archive/blogs/askds/managed-service-accounts-understanding-implementing-best-practices-and-troubleshooting

https://techcommunity.microsoft.com/t5/itops-talk-blog/step-by-step-how-to-work-with-group-managed-service-accounts/ba-p/329864


https://itconnect.uw.edu/wares/msinf/ous/guide/gmsa/


https://docs.microsoft.com/en-us/previous-versions/windows/it-pro/windows-server-2008-R2-and-2008/dd378925(v=ws.10)?redirectedfrom=MSDN


www.software-smith.com


Errata for 20742WV - Identity with Windows Server

 Lab 2

Set ip address for LON-CL1 

172.16.0.50 255.255.0.0 172.16.0.1 dns 172.16.0.10

Sign out and Sign in and out on CL1 as administrator to get credentials in Cache

 Only one hyphen:

Test-ComputerSecureChannel -Repair
 
Lab 3 
not 172.16.10.10 but 172.16.0.160 
 \LON-SVR2.Contoso.com\IT-Data should be \\LON-SVR2.Contoso.com\IT-Dat
 
Lab 4
Get-ADReplicationUpToDatenessVectorTable -Target Contoso.com 
Get-AdReplicationSubnet -filter *
 
Lab 5
Group Policy Modeling sometimes give inconstistent results, rerun as needed 
 
Lab 6
Restart DHCP on LON-DC1 
Restart LON-CL1 
\LON-DC1\Branch1Redirect should be  \\LON-DC1\Branch1Redirect 
 
Lab 7
Only one hyphen:
Set-ADGroup IT -GroupScope Global 

Add-KdsRootKey -EffectiveTime ((get-date).addhours(-10))

 New-ADServiceAccount -Name Webservice -DNSHostName LON-DC1 PrincipalsAllowedToRetrieveManagedPassword LON-DC1$

Add-ADComputerServiceAccount -identity LON-DC1 -ServiceAccount Webservice

Install-ADServiceAccount -Identity Webservice


 Lab 8
\lon-svr1\C$\RootCA.cer should be \\lon-svr1\C$\RootCA.cer 
\lon-svr1\C$ should be \\lon-svr1\C$
\lon-svr1\C$ should be \\lon-svr1\C$ 
\lon-svr1\C$\SubCA.p7b should be \\lon-svr1\C$\SubCA.p7b
\lon-svr1\C$ should be \\lon-svr1\C$ 
 
Lab 9 
\LON-DC1.Contoso.com\Branch1 should be \\LON-DC1.Contoso.com\Branch1 
In the Certificate Templates section, select All, and then select Remove 
 
Lab 10
172.16.0.161
172.16.0.10
\\TREY-DC1\CertEnrol1
C:\TREY-DC1.TreyResearch.net_TreyResearchCA.crt 
\\LON-DC1\CertEnroll
172.16.0.10 
https://lon-svr1.Contoso.com/ContosoTestApp/ 
 
Lab 12
wbadmin start systemstaterecovery -version:09/1/2025/09:18 -backuptarget:E: -machine:LON-DC1 

Wednesday, May 8, 2024

Cisco Modelling Labs - Virtualized Intel VT-X/EPT is not supported on this platform

Received following error both in VMware:Player and VMWare Workstation Pro:

Virtualized Intel VT-X/EPT is not supported on this platform

This is needed because Cisco Modeling Labs uses nested virtualization if running under VMware.

Solution is to remove Hyper-V from the machine.

Monday, November 29, 2021

How To change font size in SQL Server Management Studio.

 1. Click Tools, then Options


2. Select Fonts and Colors (under Environment). Under Show settings for: select Text Editor and change the size.


3. The font size is changed in the Query window.


4. Select Tools, then Options. Select Fonts and Colors (under Environment). Under Show settings for: select Environment and change the font and then the size.


5. The font size is now changed in the Object Explorer.


Note also the Zoom dropdown in the query window.